We have already explained about SSL and how you can order an SSL certificate. After receiving your SSL certificate you must install it on your control panel. We explained how you can install SSL on cPanel. Now in this post, we are going to show you how to go through the SSL installation on CyberPanel.
CyberPanel is a free control panel that is supported on Linux. You can see how you can install CyberPanel, create and restore backups on it, access webmail and etc in our earlier posts.
Why have SSL?
We also fully explained why it’s so important to have SSL for your website. Shortly we can say that SSL is the green lock you see on the address bar on the left side of the domain. If your website doesn’t have an SSL certificate, chrome and other web browsers will probably warn your visitors about your site and say it’s not trusted. So not having SSL results in bad SEO scores and security problems.
SSL Installation on CyberPanel
As we mentioned before, you can get free SSL for your website using CyberPanel. You can also install a licensed SSL on this control panel.
Get a free SSL:
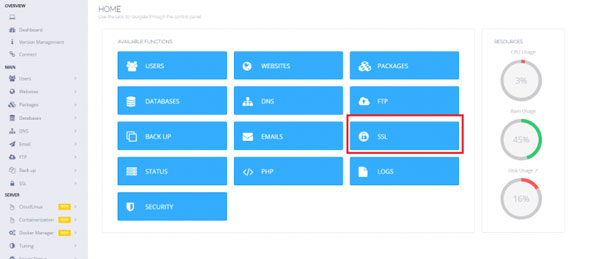
When you log into the cyberPanel’s dashboard, you can see the SSL option as you can see in the picture below.

When you go to the SSL panel, you can see three options:

- Manage SSL: Free SSL for your website.
- Hostname SSL: SSL for your Hostname.
- Mailserver SSL: SSL for all the subdomains related to your Mailserver.
Click on the “Manage SSL” option and on the new window choose your domain. Now click on the “Issue SSL option” to get your free SSL.

Please note that in order for the SSL to work, your domain‘s NameServers must be pointing to the NameServers of the server you have your website on.
Licensed SSL installation:
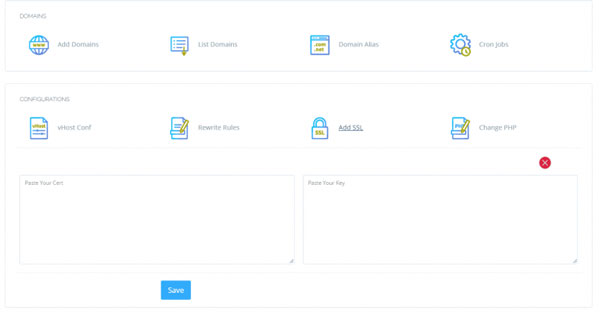
For licensed SSL installation, first, from the websites tab log into the website that you bought SSL certificate for. Now go to the manage website panel and choose the “Add SSL” option. Insert your CRT and CA to activate your SSL.

Hope you enjoyed this post if you did, you can visit our blog for more!


