As you know, CyberPanel is a free control panel that is supported on Linux. In our earlier posts, we have explained CyberPanel’s installation and some of its tabs like SSL, Backup, ایمیل and etc. In this post, we are going to explain how you can create an FTP account on CyberPanel.
Create FTP accounts on CyberPanel
When you want to move some files between servers or when you want to access server’s files without using remote connection, you can use FTP. Some of the control panels like CyberPanel made it easier for their users to create an FTP account and use it.
You can follow these steps to create FTP accounts on CyberPanel:
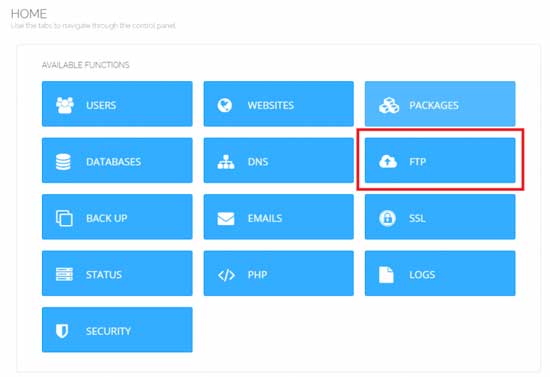
1) As the first step, log into you CyberPanel and on its Dashboard click on the FTP tab.

2) In this tab, you can see three options:

- Create FTP accounts: create a new FTP account
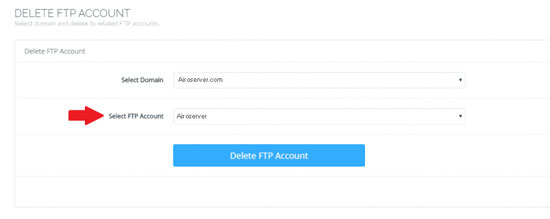
- Delete FTP accounts: Delete previously created FTP accounts
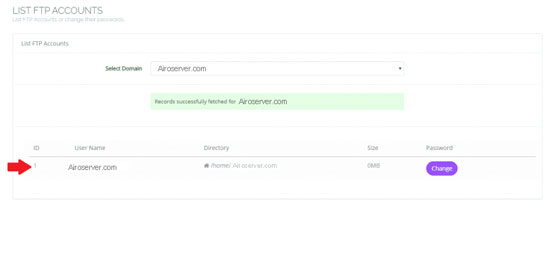
- List FTP accounts: shows you all the FTP accounts you have created before.
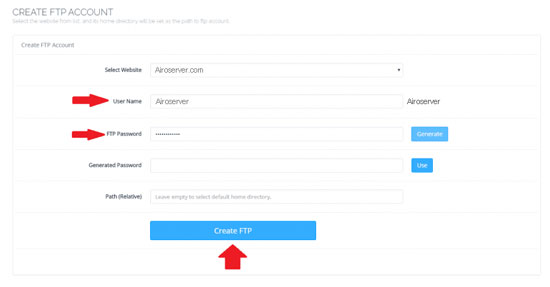
Click on the “Create FTP” option to create one. Here are the boxes you need to fill out to create your account:
- Website: The domain you want to create an FTP account for.
- User Name: The username you have for that website.
- FTP Password: Type in a strong password or use the “Generate” button to create on. If you click on the Generate button the generated button will be shown in the box with the “Generated password” title.
- Path(Relative): Here you can decide which path you want this account to have access to. You can leave this box empty if you want to access the home directory.
Now click on the “Create FTP” button to create your account.

Now you can see this account and the path you specified for in the “List FTP Accounts” tab.

You can also delete this account in the “Delete FTP accounts” tab.

Hope you enjoyed this post if you did, you can visit our blog for more!


