In our last post, we showed you how you can create a database on the Webmin control panel. In this post, we are going to explain how you can install an SSL certificate on Webmin. This is for Ubunto and the process may differ on other Operating systems.
We have a full series of posts about SSL, how you can have it and etc on our blog page. If you want to know why SSL is a necessity for a site, you can read those posts. However, to explain very shortly, SSL is the green lock next to your domain that shows your website is trusted.
Install SSL Certificate on Webmin
After you order an SSL certificate, you’ll get a zipped file from your SSL provider. The files you need from that zipped file are: (the “example_com should be replaced by your actual domain name)
- example_com.ca-bundle
- example_com.crt
- example_com.key
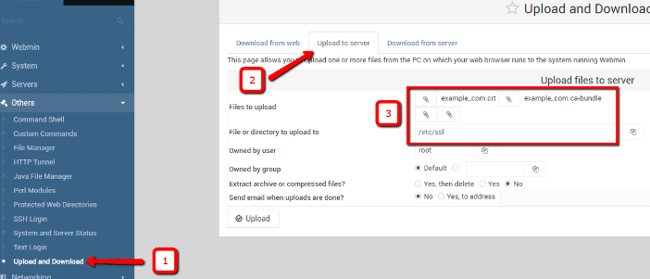
So first you need to upload these three files to the server. To do that, log in to Webmin and from the menu choose the “other” option and from the dropdown, choose “Upload and Download“. On this page, you see “Upload to Server” on the top. Choose the files from your device and click on the Upload button.
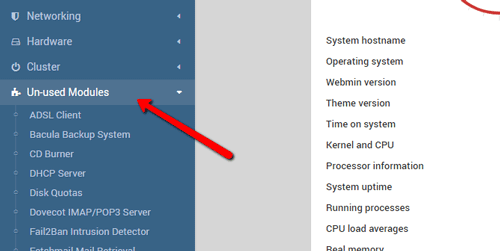
Now you need to go to Apache Webserver’s page from the menu. If you can’t find this option there, just simply go to “Unused Modules” and install Apache Webserver.
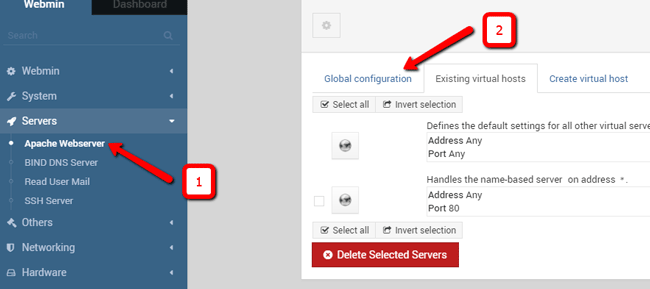
Now you can find the “Apache Webserver” in the dropdown menu of the Server option on the menu. On this page, you see the “Global configuration” on top as shown in the picture.
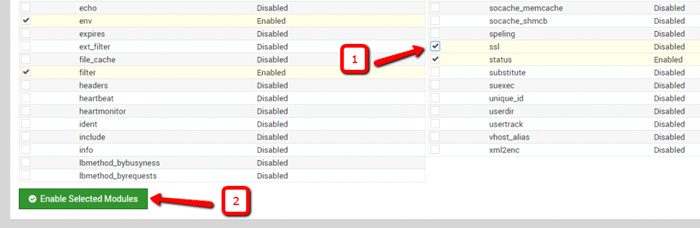
Click on the “Configure Apache Modules” icon.

Here you’ll see a list of all Apache modules. Select “SSL” and click on the “Enable Selected Modules” button.
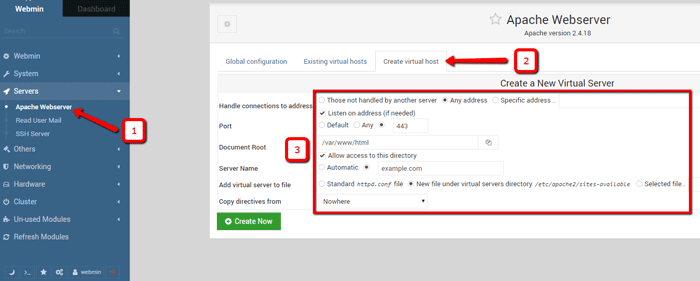
Now go back to the Apache Web server’s main page and click on the “Create virtual host” tab. Here you need to give some information:
- Port: Write 443.
- Document Root: The path you want this to be saved on.
- Server Name: Your domain
An then click on the “Create now” button to continue.
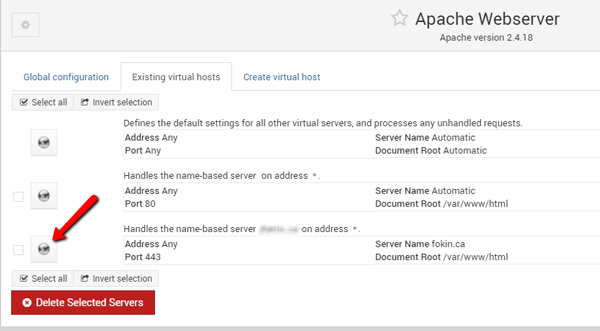
Go to the “Existing Virtual Hosts” tab and select the Virtual host you just created.
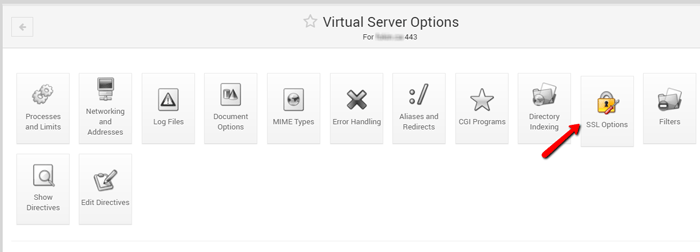
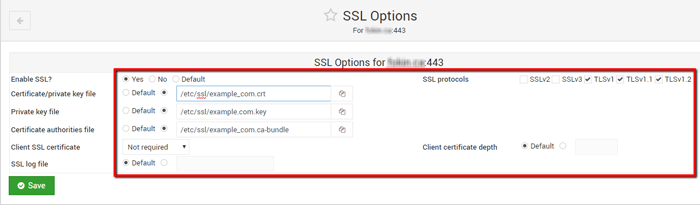
On the Virtual Server Options page, click on “SSL Options“. Edit the information as shown in the picture.
This is all done and as the last step, you just need to restart Apache to make the changes work. So, to do that, from the menu click on “System” and from the dropdown choose “Bootup and Shutdown“. On the list it shows you, choose “apache2” to restart. Your SSL certificate has been installed successfully.

Hope you enjoyed this post if you did, you can visit our blog for more!