Creating and restoring a backup is something you can do on every hosting control panel. In our earlier posts, we have explained lots of things about CyberPanel which is a free control panel. We explained about its installation, how you can add a website to it, access webmail and etc. In this post, we are going to show you how you can create a backup on CyberPanel.
Why we need a backup?
Having a backup is always a necessity. No matter how big your website or your data on the server is, you should always have a backup. Because if you don’t and anything happens to your website’s files, we are afraid to say that you’ll have to say goodbye to your website. So, please make sure to frequently create backups from your files.
Create a Backup on CyberPanel
In CyberPanel’s Dashboard, there is a tab called Backup. You can also find this option in the menu on the left.
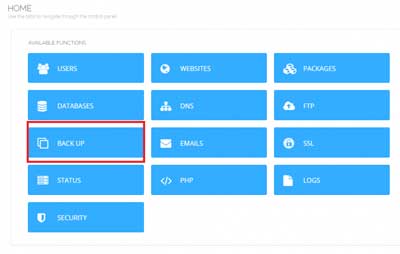
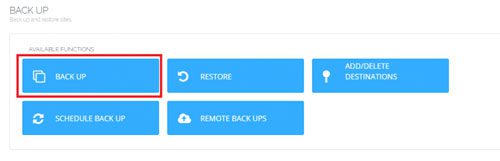
Now you see some options like Backup, Restore, and etc. Click on the Backup button to create a backup.
Choose your desired information from these two dropdowns:
- Website: Te website you want to create a backup of its data.
- Destination: the path in the file manager where you want the backup to be saved.
Now click on the create backup button to start the process.
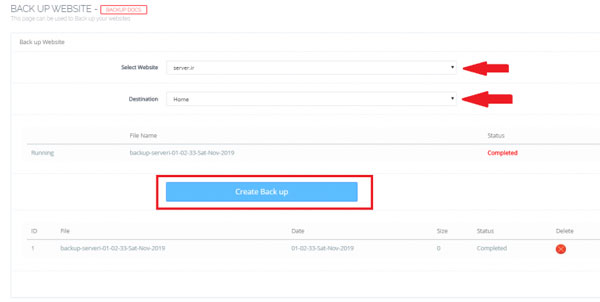
If you don’t choose a Destination, the backup will be saved in the Home/backup by default. By clicking on the backup file you can download it to your local drive (your computer).
Restore a backup on Cyberpanel
If something happened to your files or you mistakenly changed something in the codes, don’t worry about it! just easily restore your latest backup and you are good to go. You can easily restore a backup on CyberPanl. Here is how:
Same as the backup process, from the dashboard choose the Backup tab. Now from the new window, click on the restore option. Here you can choose the backup you want to restore so choose the latest backup that you created then click restore.
Hope you enjoyed this post if you did you can visit our blog for more!