This is part 2 of our last post. In our last post, we started walking you through the installation process of WordPress. So to start the WordPress installation process from the beginning, please read part1 first:
Now we have fully finished the preparation steps before starting the WordPress installation. So we are ready to transfer the WordPress files to our host. Let’s see how we can do that:
Step3: Transfering WordPress to Host
In this step of WordPress installation, We have two ways to do it:
- FTP: Setup an FTP software like Filezilla if you don’t have one and then Connect to the server using the information that the service provider gave you. Now move or copy and paste the WordPress file to the Public_html or www file. The transfer duration depends on your Internet speed.
- File Manager: Go to cPanel’s File Manager from the Home page.
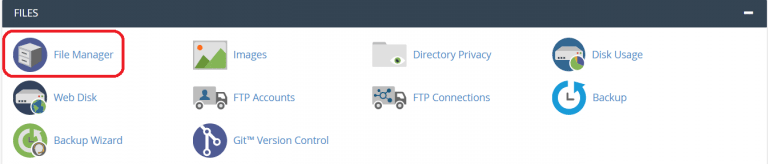
Go to the Public_html or the www file and click on upload. on the new window, click on browse and choose the WordPress zip file (zip or gz.tar), and then you wait till the upload is finished.
Go back to the file manager and right-click on the zip file to extract it. And then after extracting, delete the zip file.
Attention! If you continue the installation now, you’re going to have to access your website at this link: http://yourdomain.com/wordpress
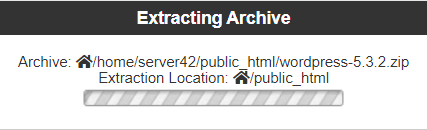
So, If you want to omit the WordPress from the end of that link, you have to move all the files that are in the WordPress folder to public_html. To do this, select all files in the WordPress folder and click on move. In the new window, clear the WordPress from the end of the path and click on “Move files”. Now all of those files are in the root.
Step4: Start the WordPress Installation
Type in www.yourdomain.com on your browser, and you’ll see a page like the one in the picture below. (If you’ve uploaded the WordPress files in a path other than Public_html, you need to add the folder’s name at the end of your address. For example www.yourdomain.com/wordpress)
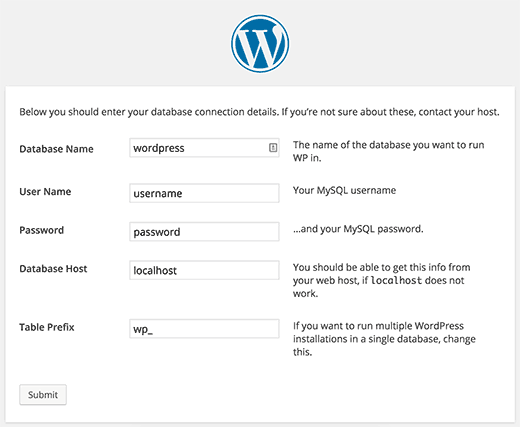
You need to enter the needed database information. These are the exact information that you used at step2 to create the database.
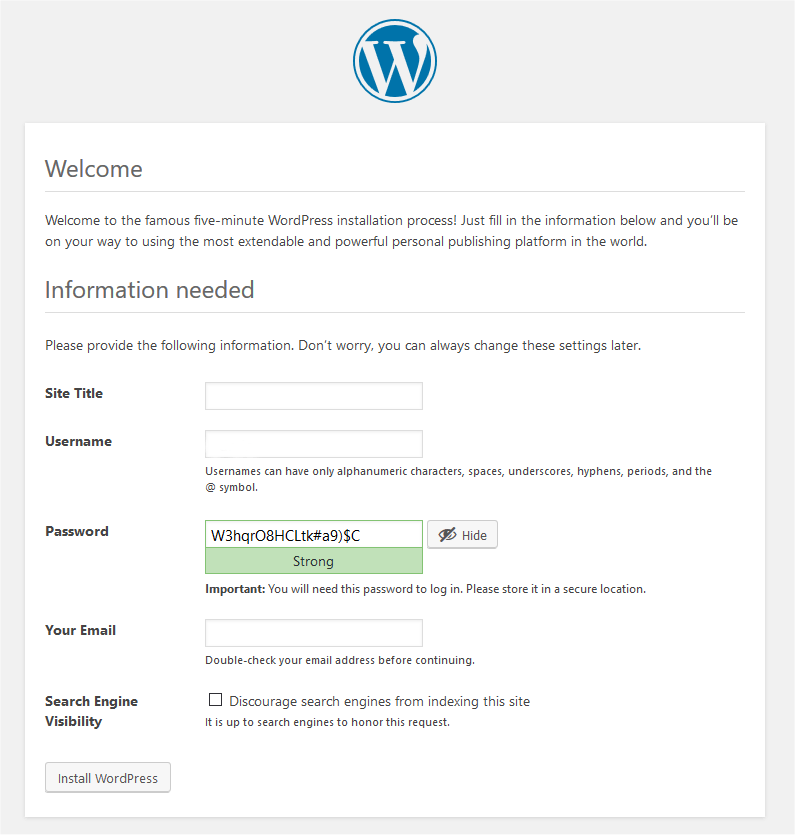
The installation begins here and remember! DO NOT use admin as your username and make sure to have a very strong password.
When the WordPress installation is done, you’ll be redirected to a page that shows your username with a message that says the installation is finished.
From now on, you can access your WordPress dashboard at www.yourdomain.com/wp-admin
Hope you enjoyed this post if you did, you can visit our blog for more!