Kernel update in Ubuntu

One of the most used operating systems in the world of server and service delivery is the Debian base operating system called Ubuntu.To learn how to change the kernel in this operating system, stay with me until the end of this article.
My chosen operating system in this scenario is the widely used ubuntu20 operating system.
Current kernel version:
Before any action, you can use the following command to view the current kernel version of your operating system:
Uname –sr

Update the repositories:
Next, as always, the first step to install, update or edit any other package in the operating system is to update the cache repo used, through the following command.
apt update

Install mailline kernel:
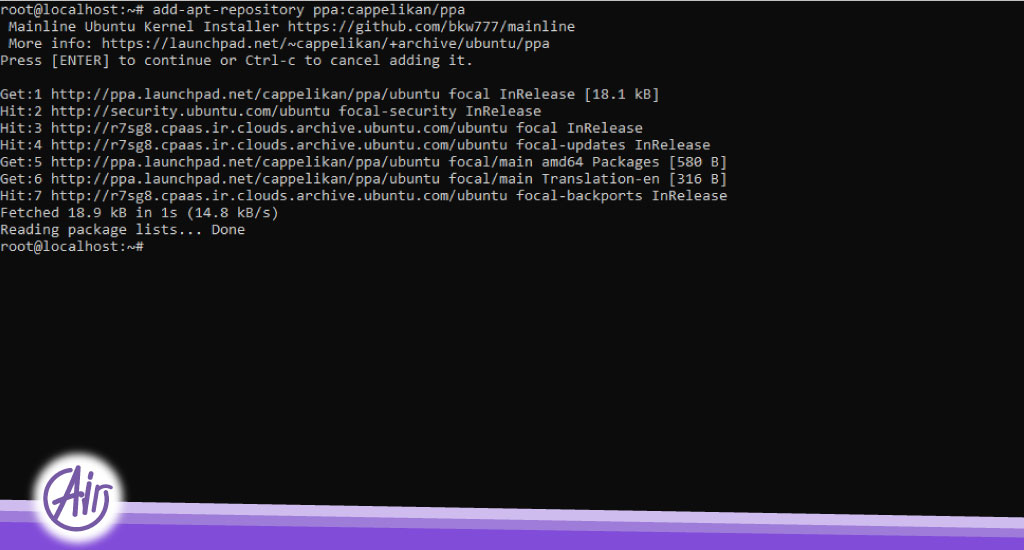
To install the main operating system kernel, a package call mainline is need. Also, to install this package, you need a repo named PPA. To install this repository, use the following command:
add-apt-repository ppa:cappelikan/ppa
After installing this repo, install the mainline package using the following command:
apt install mainline

If the mainline installation is successfully execute in your operating system, you can check and view the latest kernel versions provided by running the following command:
mainline –-check

To install the latest available kernel version, use the following command:
mainline –install-latest

The last step after completing the relevant process is re-executing the uname -sr command and viewing it version of the operating system.

After installing and updating the kernel in this example, your server will load with the latest version of the kernel, in some cases it may be necessary to select the kernel manually on your behalf.
In the default mode of your Ubuntu operating system, it comes up without a timeout and with the latest kernel version installed.
If you want to change the default settings or increase the pause time, or the boot screen of the operating system; You can do it through the visible settings in the grub file in /etc/default.

GRUB_DEFAULT
The GRUB_DEFAULT parameter specifies the kernel preference that your operating system will load with.
The number 0 means that the operating system will load with the first kernel that can display on the menu entry screen (the initial screen at the time of operating system boot), and higher numbers refer to the next kernels in the list in order of priority.
If you intend to boot your operating system with any of the kernels on the operating system boot page, you can change the number of this parameter in the grub file based on the order of priority.
Another parameter that is important for us in this file is the GRUB_TIMEOUT parameter.
This parameter refers to the pause time before booting the operating system. For example, when you are on the boot page of the operating system and it shows you the available kernels for booting if this parameter is set to 10, the waiting time on this page is 10 seconds. So, if the it is not select manually, the operating system will load with the default kernel in the grub file based on the GRUB_DEFAULT parameter.

The value of this parameter is 0 by default in our file. This means that it is not possible to choose it manually from our side and the operating system is load with the default kernel.
If desired, the value of this parameter can change according to the above description.
To get more information, you can also use the Google search engine.