DirectAdmin is one of the most famous web hosting control panels that you can have on a Linux server. We have guided you through the whole installation process of this control panel in the ” DirectAdmin Control Panel Auto-installation” post. DirectAdmin has recently released a new skin which is the “Evolution skin”. In this post, we are going to explain how you can set this skin for your DirectAdmin.
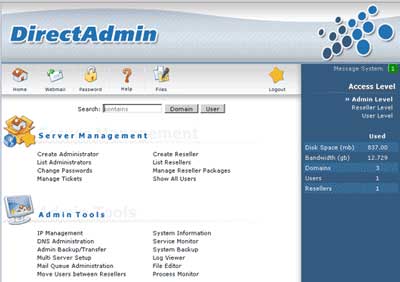
The dashboard of DirectAdmin used to look like this:
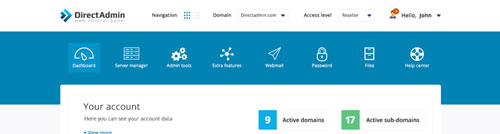
And here is a picture of the Evolution skin: And here is a picture of the Evolution skin: And here is a picture of the Evolution skin:
If you have the old skin and you want to change it to the Evolution one, follow these easy steps:
DirectAdmin Evolution Skin Installation
To start the process please establish an SSH connection to your server using the puTTy. So, this means that you can only do the installation process yourself if you have root access to your server. To have the root access to a server, your service must be either a VPS or a Dedicated Server. If you have a shared hosting service and you want the new skin on your DirectAdmin, ask from your service provider to install it for you. They’ll do the installation process for you and you can just choose the skin by logging into your DirectAdmin.
1. Enter this command to go to the file which includes different direct admin skins.
cd /usr/local/directadmin/data/skins
2. Make a directory using the command below.
mkdir EvoluSkin
3. Go to the created directory.
cd EvoluSkin
4. Download the Evolution skin:
wget -O evolution.tar.gz http://demo.directadmin.com/download/evolution.tar.gz
5. Wait for the download to complete and then enter these two commands below.
tar xvzf evolution.tar.gz
cd ..
6. Use this command to finish the installation.
chown -R diradmin:diradmin EvoluSkin
Don’t forget the last step! Now that the skin has been installed, log into your DirectAdmin and go to Reseller level > Skin management. Now choose the installed skin and click on the “apply to me” button.
Hope you enjoyed this post if you did, visit our blog for more!