Webmin is a free and open-source control panel for Linux and Windows. Previously, we have explained about Webmin’s installation and how to add a user to it. In this post, we are going to show you how you can upload a website’s file to Webmin’s File Manager.
When you want a website to be accessible through the Internet, one of the things you should do is to upload the website’s files to the server. One way of doing this is to upload the files to the file manager of your control panel.
Upload Website files to Webmin’s File Manager
َAs you know, Public-html is a file that every website must have since it includes all the things you want to be shown when someone types in your domain. Now When you want to upload a website’s files to Webmin these are the steps:
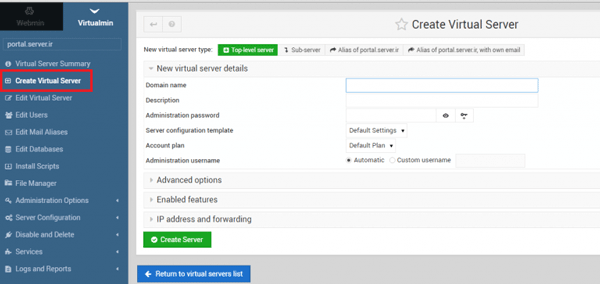
- Create a Virtual Server:
From the dashboard go to the Virtualmin tab and then from the menu, choose the “Create Virtual Server” option. Type in your username and password to create the virtual server.
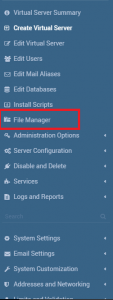
- Go to File Manager:
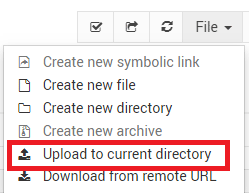
When you log into the user’s panel, you see a lot of functions you can do. One of the options on the menu is the File manager. In that window, click on the file and then on the “Upload to current directory” option. And now you can easily upload your files. The steps that we just explained are shown in the pictures:
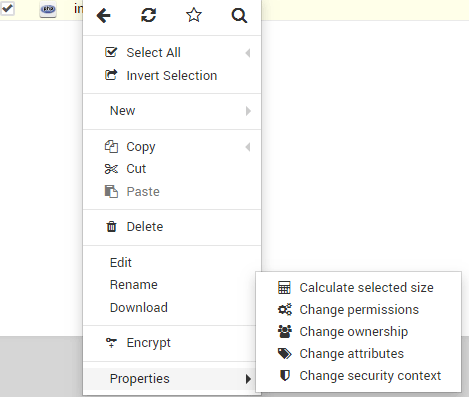
By right-clicking on each file, you can do things like copy, move, delete, edit and etc. You can also do functions such as Change permissions by clicking on the properties.
In our future posts, we will give you more explanation about Webmin’s features.
Hope you enjoyed this post if you did, you can visit our blog for more posts like this.