In this post, we are going to walk you through the IIS installation on a Windows server.
In our post about the web server, we explained what a web server is. To refresh your memory let’s give you a short explanation. A web server is a service or a feature that a server can serve to you. If you want to have a website on your server that you want the world to be able to visit it, you MUST have a web server on that server. Some web servers can only run on Linux and others on Windows. Nginx, LiteSpeed, and Apache are the three most famous Linux WebServers. But do we have Windows web servers too? Sure we do! We’ve introduced and explained fully about IIS before. IIS is a famous windows web server that works perfectly on windows servers. So let’s start the IIS installation on a Windows server.
IIS Installation
First, you need to log into your server using the remote desktop connection. From the start menu, open “Server Management”.
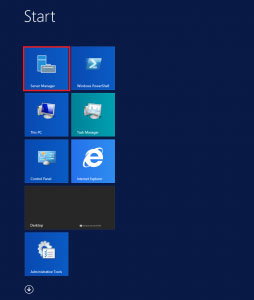
As shown in the picture, click on the “Add roles and features” to start the installation. (If you can’t find this option there, on the top-right section click on tools and then choose “Add roles and features” from the drop-down.
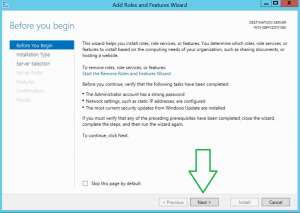
On the “Before you begin” page, click on next.
Now on the ” Select installation type” choose the “Role-based or feature-based installation” and click next.

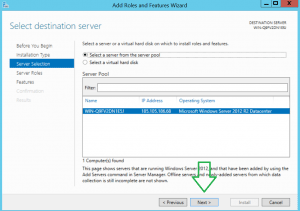
Here on the “Select a server from the server pool” you need to choose the server that you want to start IIS installation on.
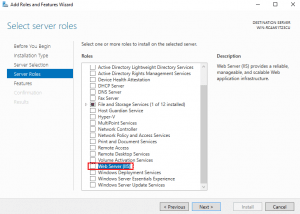
On the next page that is “Select Server Roles”, find WebServer(IIS) and click on “Add Features” when a new window shows up. Click next to continue.

We just need to hit next for the next two steps and continue.

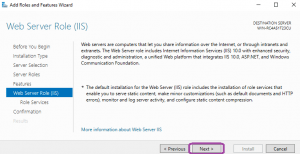
What you see here is the “Select role services” page. On this step, you can choose extra IIS features and services if needed. If you don’t need anything else just let it be in its default way. (You don’t need to worry about this part since you can always add those features and services in the future)

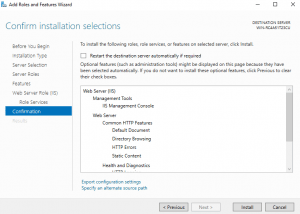
On the next page click on Install to start the IIS installation.
*There’s a “restart after installation” option here which is not an obligation but if you check that your system will be restarted after installation is done.*
After the installation is done you can close the window and now the IIS web server should work properly with the port 80 of the server’s firewall.
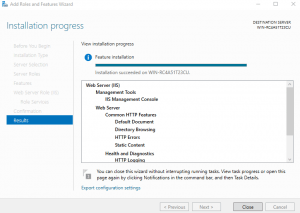
Now you can see IIS on the start menu of your server.
Hope you enjoyed this post if you did, you can visit our blog for more!